Appearance
User Guide for podsys-2204
TIP
podsys 2204 Based on Ubuntu Server 22.04.5 LTS
podsys 2204 Support x86 CPU + NVIDIA GPU (before B200 eg. H100)
1. Environment Requirements for the Management Node
TIP
Select one machine as the management node and the rest as compute nodes.
All PODsys deployment operations are performed on the management node.
1.1 Use a Node with an Existing Operating System
If you have an existing operating system management node, you need to perform the following steps:
- Create a new user: nexus.
shell
sudo adduser nexus
sudo usermod -aG sudo nexus
sudo -su nexus- Install and configure Docker.
commands
shell
sudo apt install apt-transport-https ca-certificates curl software-properties-common gnupg lsb-release
curl -fsSL https://download.docker.com/linux/ubuntu/gpg | sudo gpg --dearmor -o /usr/share/keyrings/docker-archive-keyring.gpg
echo "deb [arch=$(dpkg --print-architecture) signed-by=/usr/share/keyrings/docker-archive-keyring.gpg] https://download.docker.com/linux/ubuntu $(lsb_release -cs) stable" | sudo tee /etc/apt/sources.list.d/docker.list > /dev/null

sudo apt update
sudo apt install docker-ce docker-ce-cli containerd.io docker-compose-plugin

sudo systemctl start docker
sudo systemctl enable docker
sudo docker version

sudo groupadd docker
sudo usermod -aG docker nexus
newgrp docker
1.2 Use a freshly installed management node
- Manually install Ubuntu Server on the management node through BMC or USB, with the following settings:
yaml
version : 22.04.5
username : nexus
WARNING
- The username and Ubuntu version must match the recommendations.
- Hostname could be any string.
- Do not connect to the internet during the installation process to prevent automatic kernel updates. You can disable the network card that connects to the internet.
BMC
- Log in to the BMC; refer to the server vendor's manual for specific methods.
- Click on [Remote Control] and then click [Launch KVM].
- Click [Browse File] and then select the ubuntu-22.04.5-live-server-amd64.iso and click [Open] then click [Start Media].
- Reset the system and boot the virtual media image.
1.3 Download the podsys software stack
- Download the podsys software package
Go to Download page to download the podsys-2204.tgz. Verify the md5sum:
shell
echo "daba2a4e1440d284687ad29112574963 podsys-2204.tgz" | md5sum  --check
sudo tar -xzvf podsys-2204.tgz -C /home/nexus/- Download iso & cuda
shell
# Download iso to podsys-2204/workspace/
cd podsys-2204/workspace/
wget https://releases.ubuntu.com/jammy/ubuntu-22.04.5-live-server-amd64.iso

# Download cuda to podsys-2204/workspace/drivers/
cd podsys-2204/workspace/drivers
wget https://developer.download.nvidia.com/compute/cuda/12.8.2/local_installers/cuda_12.8.2_570.211.01_linux.run- Run install_manager.sh(If use a freshly installed management node)
shell
cd podsys-2204/
sudo ./install_manager.sh- After reboot, run the following command to check the health of the software stack.
shell
sudo ./scripts/health-checks.sh2. Steps to Deploy the Compute Nodes
These deployment steps are executed on the management node.
2.1 Modifying iplist.txt
shell
sudo vim workspace/iplist.txtExample of "iplist.txt":
| Serial Number | hostname | IP address | gateway | DNS | IPoIB | Docker IP |
|---|---|---|---|---|---|---|
| 24X01 | node01 | 192.168.0.1/24 | 192.168.0.1 | 8.8.8.8 | 192.168.1.1/24 | 172.17.0.1/16 |
| 24X02 | node02 | 192.168.0.2/24 | none | none | 192.168.1.2/24 | 172.17.0.1/16 |
| 24X03 | node03 | 192.168.0.3/24 | none | none | 192.168.1.3/24 | none |
Tips
Firstly, you can prepare your data in a consistent format within an Excel spreadsheet, then directly copy it into a blank iplist.txt file opened with Vim.
cat -A iplist.txtThe correct output should resemble:
24X01^Inode01^I192.168.0.1/24^Inone^Inone^I192.168.1.1/24^Inone$
24X02^Inode02^I192.168.0.2/24^Inone^Inone^I192.168.1.2/24^Inone$
Here, ^I represents a tab character used to separate different fields within each line, and $ denotes the end of a line.
DANGER
Don't forget the subnet mask when dealing with IPs.
DHCP / PXE environment
- PODsys deployment requires the Manager Node to act as the DHCP server. Make sure there is no other DHCP source on the deployment network.
- If another DHCP source exists on the network and cannot be isolated or disabled, create a
workspace/mac_ip.txtfile (host path; inside the container this is/workspace/mac_ip.txt). - Each line starts with the MAC address of the compute node's NIC that will PXE boot, followed by the IP address to assign. The deployment server will only respond to DHCP requests from these MAC addresses.
- The MAC address and IP must be separated by an English comma
,. - Do not create this file if there is no conflicting DHCP source.
File example:
txt
24:01:00:00:00:01,192.168.0.1
24:01:00:00:00:02,192.168.0.2
2.2 Modifying config.yaml
shell
cd podsys-2204/
sudo vim workspace/config.yaml
Contents that needs to be modified:
yaml
manager_ip: 192.168.0.1
manager_nic: ens6f0
manager_user: nexus
dhcp_s: 192.168.0.1
dhcp_e: 192.168.0.200
compute_passwd: your_passwd
compute_storage: sda- manager_ip: The IP address of the management node.
- manager_nic: The NIC identifier of the management node.
- dhcp_s & dhcp_e: During network installation, the range of IP addresses allocated for compute nodes.
WARNING
The number of IP addresses required is greater than the number of compute nodes.
Example
- Management node IP: 192.168.0.201/16.
- Compute nodes (200 units) are set in the iplist.txt as 192.168.0.1/24 to 192.168.0.200/24.
- You can set dhcp_s to 192.168.1.1 and dhcp_e to 192.168.3.254.
- This ensures that the DHCP range does not conflict with the static IPs allocated for compute nodes in iplist.txt, maintains connectivity within the range of IP addresses including the management node, and provides sufficient IP addresses within the range.
- After installation, you can modify 192.168.0.201/16 to 192.168.0.201/24.
compute_passwd: The user password for the compute node.
compute_storage: The installation location of the compute node system(e.g., sda, sdb, nvme0n1).
you also can useMIN_SATAMAX_SATAMIN_NVMEorMAX_NVME.compute_storage(Beta):As of now, RAID1 with exactly two disks is supported. To enable RAID1, use the following YAML block format in your config.yaml:
yaml
...
compute_passwd: your_passwd
compute_storage:
  type: raid1
  devices: [sda, sdb]
Requirements: Exactly two disks listed in devices Both disks must be present, unmounted, and of sufficient size Supported disk names: sda, sdb, nvme0n1, etc.
WARNING
This will overwrite the original data on the Disk.
2.3 Running install_compute.sh
WARNING
Running the following script will start some services based on the previously filled configuration information. If you have modified config.yaml and iplist.txt, you need to exit the script and re-run it. Before running, you can refer to 6. Personalized Configuration for personalized settings.
shell
sudo ./install_compute.shThen you will access an interactive command-line interface within a running Docker:
like this
**
 Welcome to the cluster deployment software
Configuring, please wait...
  ____     ___    ____    ____   __   __  ____
 |  _ \   / _ \  |  _ \  / ___|  \ \ / / / ___|
 | |_) | | | | | | | | | \___ \   \ V /  \___ \
 |  __/  | |_| | | |_| |  ___) |   | |    ___) |
 |_|      \___/  |____/  |____/    |_|   |____/

dhcp-config : /etc/dnsmasq.conf
user-data   : /user-data/user-data

starting services:
 * Starting DNS forwarder and DHCP server dnsmasq   [ OK ]
 * Starting nginx nginx                             [ OK ]

Running Monitor on following URLs:
 * http://192.168.0.201:5000

root@podsys:/ $
Preparation is complete, and the compute node awaiting system installation is now powered on.
TIP
- Start the compute nodes without an installed operating system to initiate automatic installation.
- If the compute nodes already have an operating system, they need to be placed in PXE (Preboot Execution Environment) mode.
- If the compute node fails to enter PXE installation, check whether the firewall on the management node is disabled.
2.4 Monitor the installation progress
You can check the installation progress by accessing http://manager_ip:5000.
Details
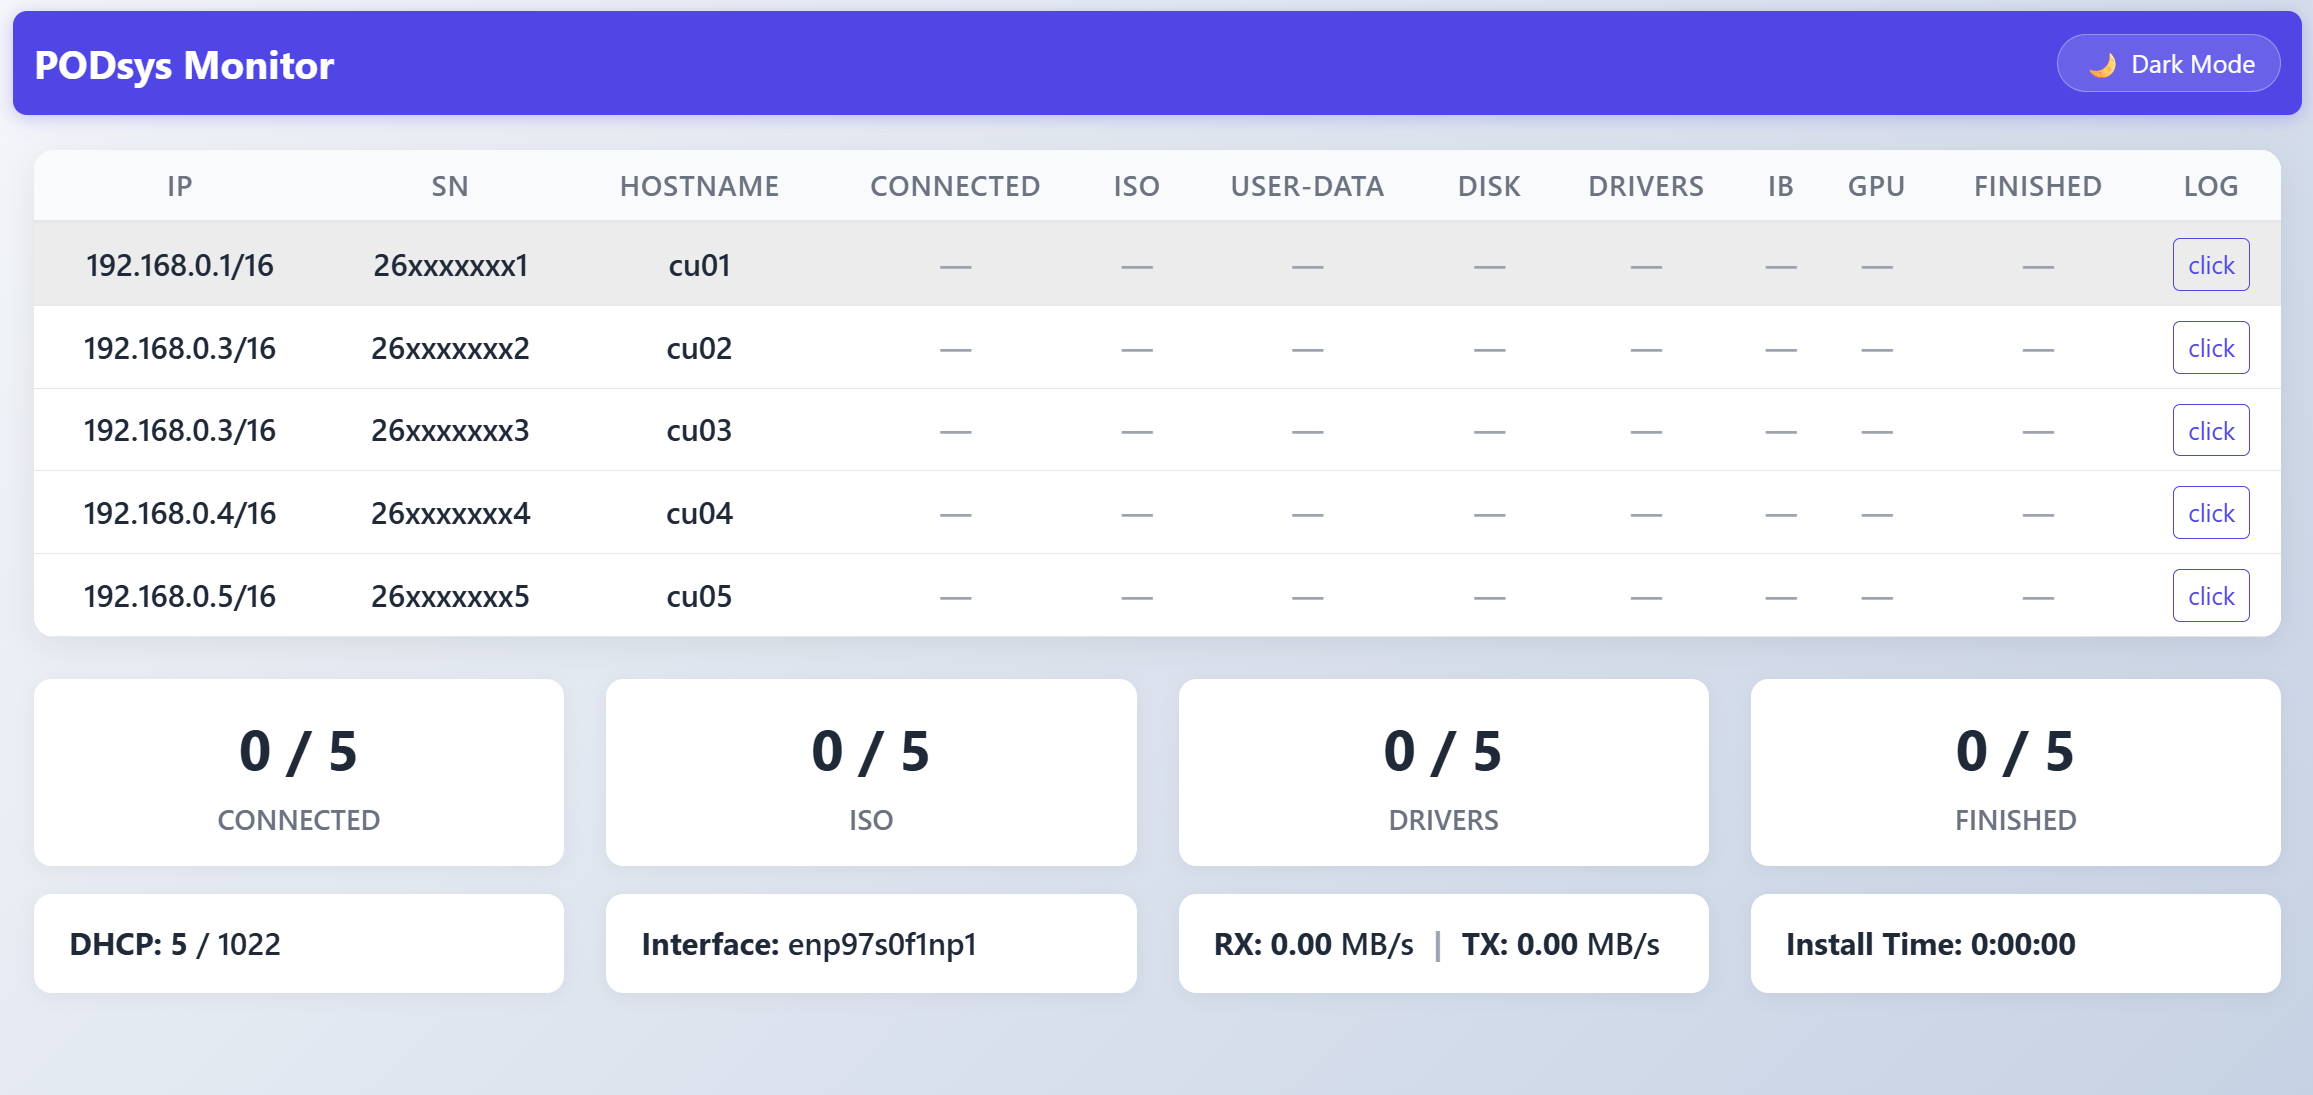
TIP
- A ✓ for each item indicates that the detection is normal, while a ✗ signifies that the hardware component is missing.
- When a specific log name appears in the logs, you can click to view the log details.
- An exclamation mark (!) in the disk column suggests that the disk specified in the config.yaml file does not exist on the node.
After the installation is complete, the compute nodes will reboot automatically.
Type "exit" on command-line interface to finish the installation of the compute node.
2.5 Run install_progress.sh
Once all compute nodes have been restarted, run:
shell
sudo ./install_progress.shThis command can be executed multiple times until all compute nodes are successfully SSHed into.
Then:
shell
sudo ./config_server.sh -preINFO
- In the podsys-2204 folder, generate a
host.txtfile. This file should contain the IP addresses of all nodes that can be successfully accessed via SSH. This is important for subsequent parallel environment configuration. - This will ensure passwordless SSH login among the nexus users across all nodes.
2.6 Check the installation result
Run the following command to check the installation result:
shell
sudo ./config_client.sh -health-checkshell
172.16.0.1: PODsys deployment successful
172.16.0.2: PODsys deployment successful
172.16.0.3: PODsys deployment successful
...