Appearance
User Guide for podsys-lite
TIP
if you just want to install base os, you can download the lite version.
1. Manager Node Environment Requirements
TIP
Select one machine as the Manager Node and the rest as Compute Nodes.
All PODsys deployment operations are performed on the Manager Node.
- Create a new user: nexus.
shell
sudo adduser nexus
sudo usermod -aG sudo nexus
sudo -su nexus- Install and configure Docker Environment
- An Ethernet port capable of connecting to compute nodes.
- Download the podsys software package
Go to Download page to download the podsys-lite.tgz. Verify the md5sum:
shell
echo "48dd10a5b59a513f0bea9f25826d487d  podsys-lite.tgz" | md5sum  --check
sudo tar -xzvf podsys-lite.tgz -C /home/nexus/
cd podsys-lite/
2. Deploy Compute Nodes
The installation steps for the compute node are to be executed on the Manager Node.
2.1 Modifying iplist.txt
shell
sudo vim workspace/iplist.txtExample of "iplist.txt":
| Serial Number | Hostname | IP address | Gateway | DNS |
|---|---|---|---|---|
| 24X01 | node01 | 192.168.0.1/24 | 192.168.0.1 | 8.8.8.8 |
| 24X02 | node02 | 192.168.0.2/24 | none | none |
Tips
Firstly, you can prepare your data in a consistent format within an Excel spreadsheet, then directly copy it into a blank iplist.txt file opened with Vim.
cat -A iplist.txtThe correct output should resemble:
24X01^Inode01^I192.168.0.1/24^Inone^Inone$
24X02^Inode02^I192.168.0.2/24^Inone^Inone$
Here, ^I represents a tab character used to separate different fields within each line, and $ denotes the end of a line.
DANGER
Don't forget the subnet mask when dealing with IPs.
DHCP / PXE environment
- PODsys deployment requires the Manager Node to act as the DHCP server. Make sure there is no other DHCP source on the deployment network.
- If another DHCP source exists on the network and cannot be isolated or disabled, create a
workspace/mac_ip.txtfile (host path; inside the container this is/root/workspace/mac_ip.txt). - Each line starts with the MAC address of the compute node's NIC that will PXE boot, followed by the IP address to assign. The deployment server will only respond to DHCP requests from these MAC addresses.
- The MAC address and IP must be separated by an English comma
,. - Do not create this file if there is no conflicting DHCP source.
File example:
txt
24:01:00:00:00:01,192.168.0.1
24:01:00:00:00:02,192.168.0.2
2.2 Modifying config.yaml
shell
sudo vim workspace/config.yamlContents that needs to be modified:
yaml
manager_ip: 192.168.2.11
dhcp_s: 192.168.2.201
dhcp_e: 192.168.2.220
manager_nic: enp61s0f1
compute_passwd: your_passwd
compute_username: nexus
PermitRootLogin: yes
iso: ubuntu-22.04.5-live-server-amd64.iso
compute_storage: sda- manager_ip: The IP address of the Manager Node.
- manager_nic: The NIC identifier of the Manager Node.
- dhcp_s & dhcp_e: During network installation, the range of IP addresses allocated for compute nodes.
- compute_passwd: The password for the compute node user.
- compute_username: The username for the compute node (e.g.,
nexus).
WARNING
The number of IP addresses required is at least three times the number of compute nodes.
Example
- Manager Node IP: 192.168.0.1/16.
- Compute nodes (200 units) are set in the
iplist.txtas 192.168.0.2/16 to 192.168.0.201/16. - You can set
dhcp_sto 192.168.1.1 anddhcp_eto 192.168.3.254. - This ensures that the DHCP range does not conflict with the static IPs in
iplist.txt, maintains connectivity for all nodes including the Manager Node, and provides a sufficient number of IP addresses.
- compute_passwd: The password for the compute node user.
- PermitRootLogin:
yesorno
WARNING
PermitRootLogin: This option is not applicable during Ubuntu installation.
- iso: The ISO file used for installation.
supported iso
ubuntu-24.04.4-live-server-arm64.iso
ubuntu-24.04.4-live-server-amd64.iso
ubuntu-22.04.5-live-server-amd64.iso
ubuntu-20.04.6-live-server-amd64.iso
etc.
compute_storage: The installation location of the compute node system(e.g.,
sda,sdb,nvme0n1). you also can useMIN_SATAMAX_SATAMIN_NVMEorMAX_NVME.compute_storage(Beta):As of now, RAID1 with exactly two disks is supported. To enable RAID1, use the following YAML block format in your config.yaml:
yaml
...
iso: ubuntu-22.04.5-live-server-amd64.iso
compute_storage:
  type: raid1
  devices: [sda, sdb]
Requirements: Exactly two disks listed in devices Both disks must be present, unmounted, and of sufficient size Supported disk names: sda, sdb, nvme0n1, etc.
WARNING
This will overwrite the original data on the Disk.
2.3 Download iso
- download the iso file and move it to the
workspacedirectory.
shell
mv ubuntu-22.04.5-live-server-amd64.iso podsys-lite/workspace2.4 Running install_compute.sh
WARNING
Running the following script will start some services based on the previously filled configuration information. If you have modified config.yaml and iplist.txt, you need to exit the script and re-run it.
shell
sudo ./install_compute.shThen you will access an interactive command-line interface within a running Docker:
like this
*
 Welcome to the podsys-lite
  ____     ___    ____    ____   __   __  ____
 |  _ \   / _ \  |  _ \  / ___|  \ \ / / / ___|
 | |_) | | | | | | | | | \___ \   \ V /  \___ \
 |  __/  | |_| | | |_| |  ___) |   | |    ___) |
 |_|      \___/  |____/  |____/    |_|   |____/ (lite)

dhcp-config : /etc/dnsmasq.conf
user-data   : /root/user-data/user-data

 * Starting DNS forwarder and DHCP server dnsmasq       [ OK ]
Running Monitor on following URLs:
 * http://192.168.2.102:5000

root@podsys:~ $
Preparation is complete, and the compute node awaiting system installation is now powered on.
TIP
- Start the compute nodes without an installed operating system to initiate automatic installation.
- If the compute nodes already have an operating system, they need to be placed in PXE (Preboot Execution Environment) mode.
2.5 Monitor the installation progress
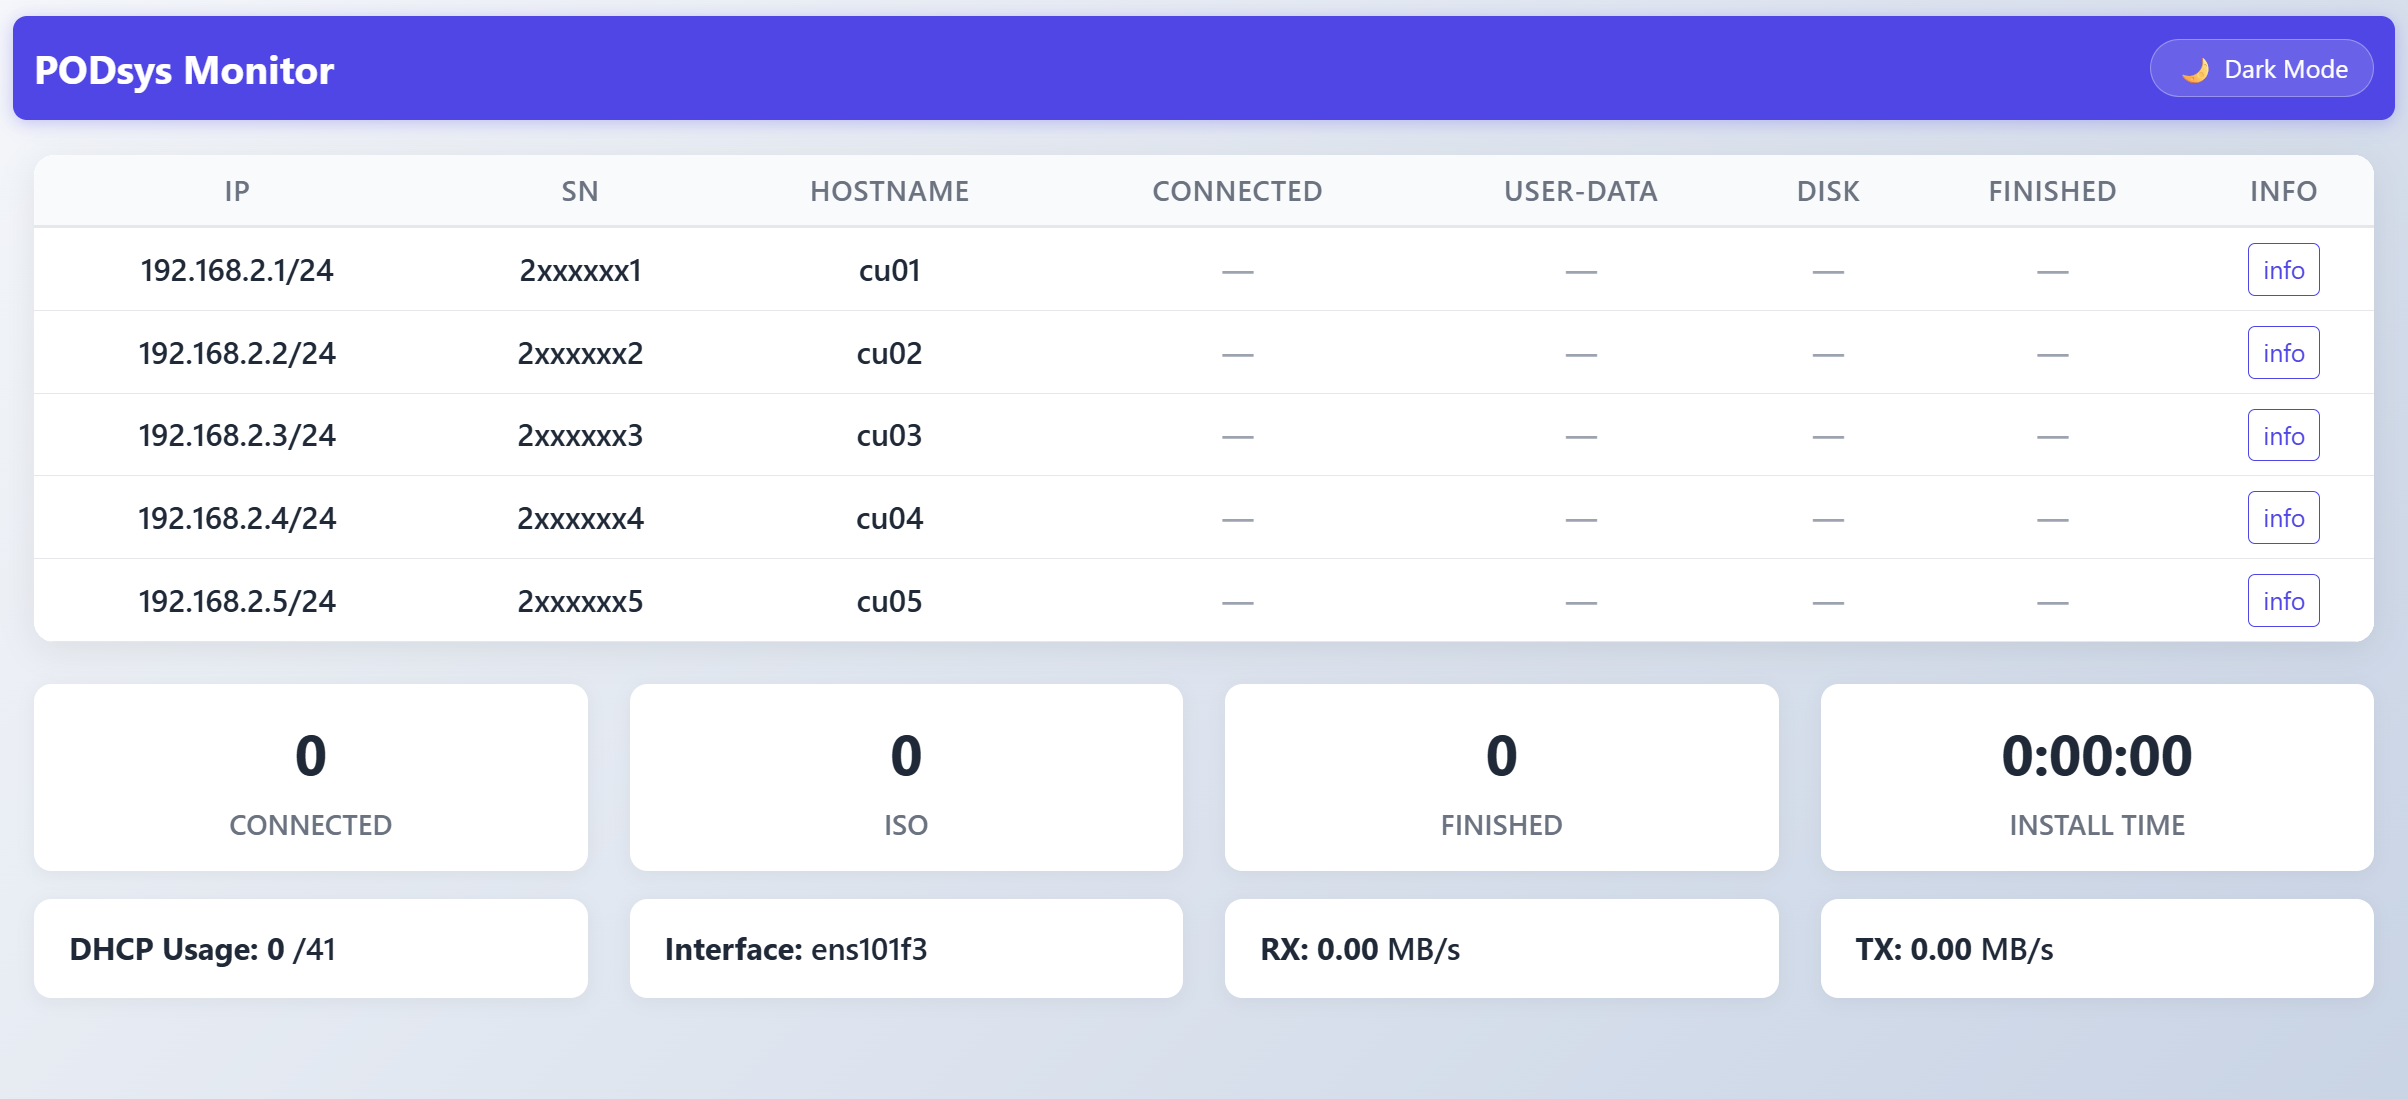
You can check the installation progress by accessing http://manager_ip:5000.
TIP
- A ✓ for each item indicates that the detection is normal, while a ✗ signifies that the hardware component is missing.
- When a specific log name appears in the logs, you can click to view the log details.
- An exclamation mark (!) in the disk column suggests that the disk specified in the config.yaml file does not exist on the node.
After the installation is complete, the compute nodes will reboot automatically.
Type "exit" on command-line interface to finish the installation of the compute node.